Antes de tudo quero deixar dois alertas sobre seu código:
Sempre inicie a tela dentro da Event-Dispatch-Thread, pois swing não é Thread-Safe, e toda a GUI precisa iniciar dentro desta unica Thread. Nesta resposta explica melhor o motivo para isto e eventuais problemas que podem ocorrer. Esta outra resposta mostra algumas maneiras de como iniciar a aplicação dentro desta Thread.
Evite usar layout absoluto, a API do swing provê de vários Layouts Managers para facilitar a vida do programador na hora de criar telas, além de tornar a tela flexivel a diferentes tamanhos de monitores e resoluções , sem que seja necessário isso ser tratado diretamente no código. Layout absoluto irá quebrar a aparencia da sua aplicação, dependendo do monitor onde a aplicação for executada.
Utilizando a classe BufferedImage, você consegue recuperar as cores RGB de uma imagem. Primeiro, deve-se criar uma instancia dessa classe, passando as dimensões da imagem:
BufferedImage bufImage = new BufferedImage(image.getIconWidth(), image.getIconHeight(),
                BufferedImage.TYPE_INT_RGB);
Após isso, você precisa "preencher" o buffer com a imagem. O JLabel é preenchido por um ImageIcon mas o método drawimage() espera um tipo Image. Pode-se recuperar este tipo do ImageIcon, pelo método getimage():
    ImageIcon imgIcon= label.getIcon();
    Graphics g = bufImage.createGraphics();

    g.drawImage(imgIcon.getImage(), 0, 0, null);
Com a imagem já "bufferizada", basta utilizar o método getRGB(x,y) para recuperar o valor RGB do pixel, de acordo com as coordenadas passadas pelo movimento do mouse, limitando ao tamanho da imagem:
    int x = (int) e.getX();
    int y = (int) e.getY();

    if(x < imgIcon.getIconWidth() && y < imgIcon.getIconHeight()){
        int rgb = bufImage.getRGB(x, y);
        System.out.println(new Color(rgb));
    }
Apenas inserindo estes trechos no seu método mouseMoved já resolveria o problema, mas para separar a responsabilidade de manusear o Label da classe principal, organizar melhor o código e tornar o componente reaproveitável, você pode criar uma classe de JLabel personalizada e aplicar essas alterações apenas nela. Neste caso, criei a classe CustomLabel para exemplificar:
class CustomLabel extends JLabel implements MouseMotionListener {

    private ImageIcon image;

    public CustomLabel(ImageIcon image) {
        this.image = image;
        setIcon(image);
        this.addMouseMotionListener(this);
    }

    @Override
    public void mouseDragged(MouseEvent e) {
        // TODO Auto-generated method stub
    }

    @Override
    public void mouseMoved(MouseEvent e) {

        int x = (int) e.getX();
        int y = (int) e.getY();

        BufferedImage bufImage = new BufferedImage(image.getIconWidth(), image.getIconHeight(),
                BufferedImage.TYPE_INT_RGB);

        Graphics g = bufImage.createGraphics();

        g.drawImage(image.getImage(), 0, 0, null);

        if(x < image.getIconWidth() && y < image.getIconHeight()){
            int rgb = bufImage.getRGB(x, y);
            System.out.println(new Color(rgb));
        }

    }
}
Para utilizar no seu código, basta criar esta classe no seu projeto e substituir:
JLabel label = new JLabel(new ImageIcon("folder/matiz.jpg"));
por:
CustomLabel label = new CustomLabel(new ImageIcon("folder/matiz.jpg"));
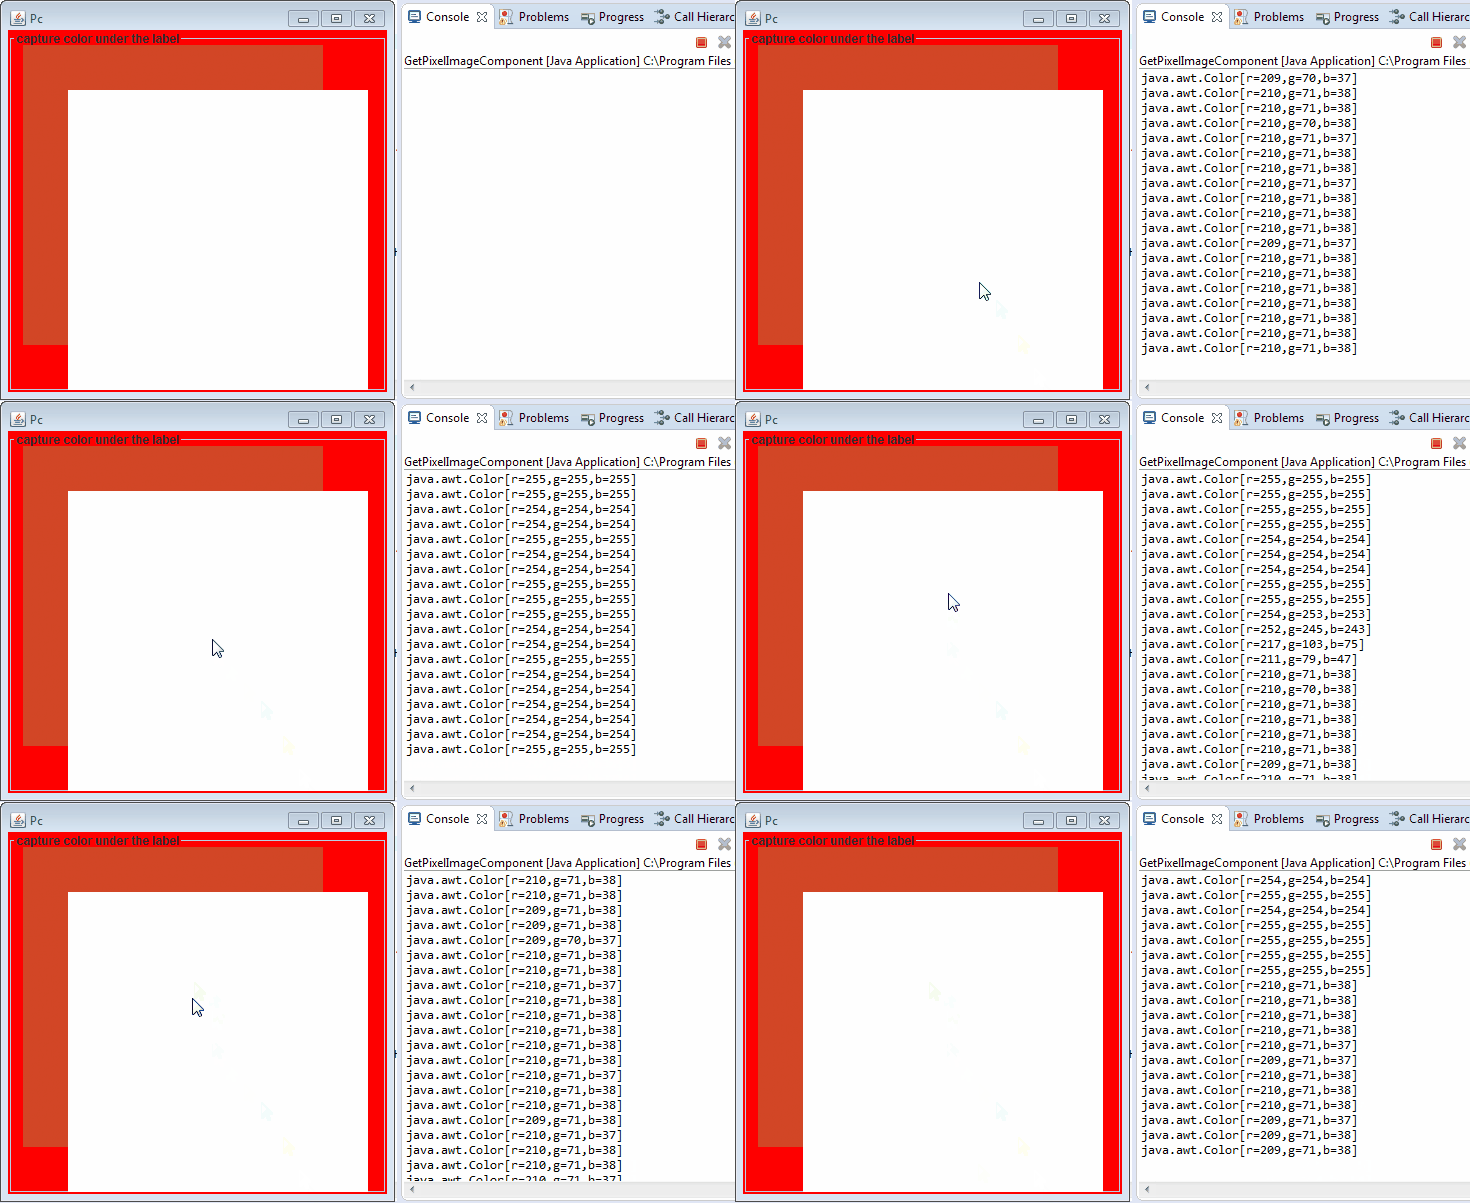
Veja um exemplo funcional do seu código com a classe acima:
import java.awt.*;
import javax.swing.*;
import java.awt.event.*;
import java.awt.image.BufferedImage;
import java.net.*;

public class GetPixelImageComponent {

    public void showAndCreateGUI() throws MalformedURLException, AWTException {

        JFrame frame;
        Robot robot;
        JLayeredPane layeredPane;
        MouseMotionListener ml;

        robot = new Robot();
        frame = new JFrame("Pc");
        frame.setDefaultCloseOperation(JFrame.EXIT_ON_CLOSE);

        layeredPane = new JLayeredPane();
        layeredPane.setPreferredSize(new Dimension(300, 310));
        layeredPane.setBorder(BorderFactory.createTitledBorder("capture color under the label"));


        /** ESTAS DUAS LINHAS SÃO APENAS PARA DEMONSTRAÇÃO **/
        URL url = new URL("http://wimages.vr-zone.net/2013/06/10-15-2012-2-22-52-PM-300x300.png");
        CustomLabel label = new CustomLabel(new ImageIcon(url));

        //CustomLabel label = new JLabel(new ImageIcon("folder/matiz.jpg"));
        label.setBounds(15, 15, 300, 300);
        label.setOpaque(true);
        label.setBackground(Color.black);

        JLabel label1 = new JLabel();
        label1.setBounds(60, 60, 300, 300);
        label1.setOpaque(true);
        label1.setBackground(new Color(255, 255, 255));

        layeredPane.add(label, 0, 0);
        layeredPane.add(label1, 1, 0);

        frame.setSize(660, 400);

        frame.getContentPane().setBackground(Color.red);
        frame.setGlassPane(layeredPane);
        layeredPane.setVisible(true);
        frame.setVisible(true);

    }

    public static void main(String[] args) throws Exception {
        EventQueue.invokeLater(() -> {
            try {
                new GetPixelImageComponent().showAndCreateGUI();
            } catch (MalformedURLException | AWTException e) {
                e.printStackTrace();
            }
        });
    }

    class CustomLabel extends JLabel implements MouseMotionListener {

        private ImageIcon image;

        public CustomLabel(ImageIcon image) {
            this.image = image;
            setIcon(image);
            this.addMouseMotionListener(this);
        }

        @Override
        public void mouseDragged(MouseEvent e) {
            // TODO Auto-generated method stub
        }

        @Override
        public void mouseMoved(MouseEvent e) {

            int x = (int) e.getX();
            int y = (int) e.getY();

            BufferedImage bufImage = new BufferedImage(image.getIconWidth(), image.getIconHeight(),
                    BufferedImage.TYPE_INT_RGB);

            Graphics g = bufImage.createGraphics();

            g.drawImage(image.getImage(), 0, 0, null);

            if(x < image.getIconWidth() && y < image.getIconHeight()){
                int rgb = bufImage.getRGB(x, y);
                System.out.println(new Color(rgb));
            }

        }
    }
}
Que resulta em:

